
Day Three
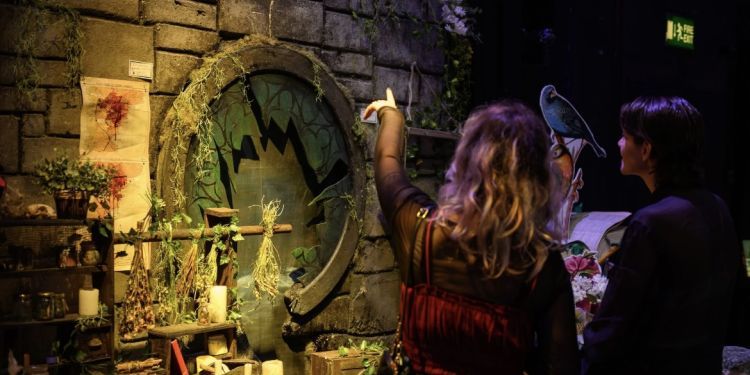
The Eight Days of Christmas highlights students and alumni whose education has been supported by a scholarship. From now until noon on 9 December, the Big Give is doubling every online donation until we reach our goal.
Your generosity creates next year’s scholarships, inspiring the new stories that come with them.
How to make a giant octopus
By Ruby Hoffer (Production Arts, first year)

Step one: The task
For our first year Design Realisation project, we were given a model box with the theme ‘shipwrecked’, and our task was to recreate it to scale. Out of everything in the box, the part I was most interested in was the figurehead of the boat – an octopus. I knew this is what I wanted to make.
Step two: The research
To get some context, we went to the Maritime Museum to look at ships and pirates, and to understand where and when we want our shipwreck to be placed. I also watched Pirates of the Caribbean: Dead Man's Chest to look at the kraken.
Step three: More research
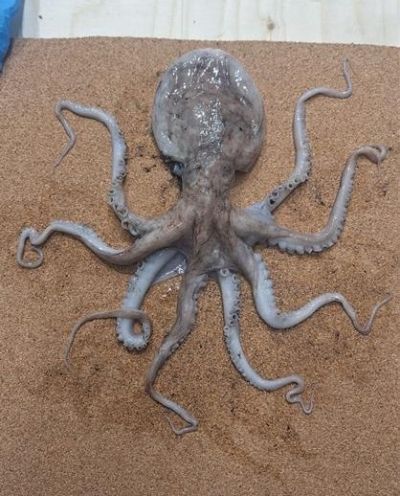
I wanted a better understanding of the anatomy of an octopus, so I went to the Natural History Museum. Sadly, they had no octopuses. This was inconvenient.
Because I knew I had to work from life, the next obvious answer was to go to the biggest British inland fish market – Billingsgate – at 7am. I bought an octopus, took it back to my flat on the Tube in a translucent bag, put it on ice, and brought it into the School so I could draw and photograph it to model my sculpture from.
Step four: The plan
I planned to create the octopus out of polystyrene, adding foam coat, followed by the suckers and then painting it. Luckily, I’ve used polystyrene before, as we learnt how to use it earlier in the course.
Step five: Troubleshooting
One difficulty I immediately ran into was that the figurehead octopus sits on a slope, and some of the tentacles connect to another flat at a 45-degree angle. This meant I had to create a base before the real curved flat was made.
I joined two pieces of MDF together to get the 45-degree angle because the tentacles would connect to both flats and curve across them. Making them separate from the main body made shaping easier, but it did set back my timeline.
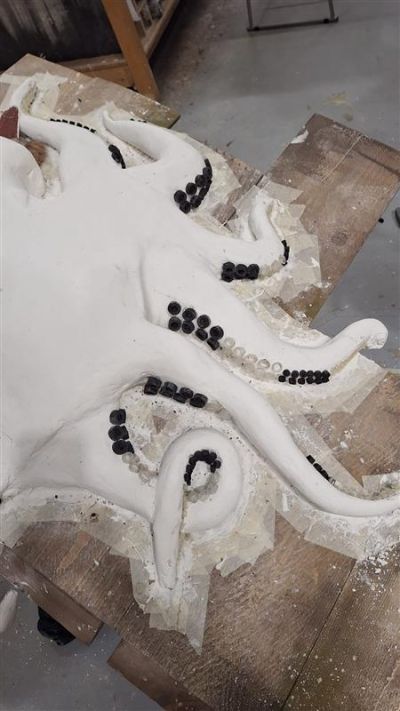
Step six: The build
Once I began creating the octopus, it became a cycle of gluing and carving the polystyrene, then applying two coats of foam coat to seal it, hold it together and make it smoother. There was a lot of sanding. Then came the suckers – hundreds of them – which I glued on, although many still came off during painting, so it doesn’t give the full effect I was going for.
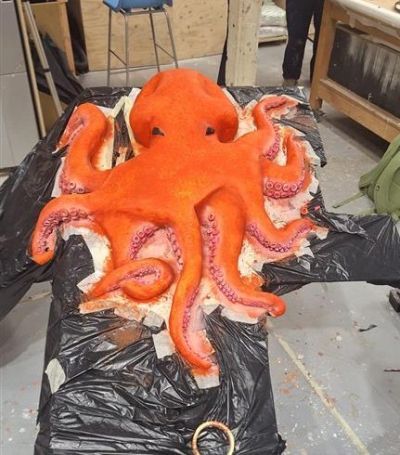
Regarding the paint – I started with a base colour, then worked in with a spray gun to create depth. Now I’m just making sure everything looks good before the whole ship, including the octopus, gets ‘weathered’ to look like it has spent a long time at sea.
Step seven: The display
My octopus, along with the whole shipwreck created by all eight of us first year Design Realisation students was displayed at the Design Realisation Project exhibition in the Silk Street workshop.
Watch the video below to see the final product!
Video
Double your donation now
Donate here between 2 – 9 Dec
Return to Eight Days of Christmas